
Jimmy Boinembalome
Configure ESLint with Angular
Quick steps to install EsLint in an Angular project.

ESLint is a popular static code analyzer (linter) that helps us find and fix problems in JavaScript code if configured rules are violated. In the past, Angular used by default another linter called TSLint which was deprecated in 2019. This is because the TSLint team wanted to focus their efforts on ESLint's support for TypeScript as the tool of choice for JavaScript linting.
As a result, Angular has decided to remove TSLint from Angular v12.
In this article, we will install ESLint in an Angular v15 project.
Prerequisites
Before to start you will need:
- Node.js: Angular requires an active LTS (Long Term Support) or maintenance LTS version of Node.js.
- Angular CLI: We will use the Angular CLI to create an Angular project.
- Visual Studio Code: The editor to add a new component inside the project. (You can choose your favourite editor or IDE as well 🙂)
Create an Angular project
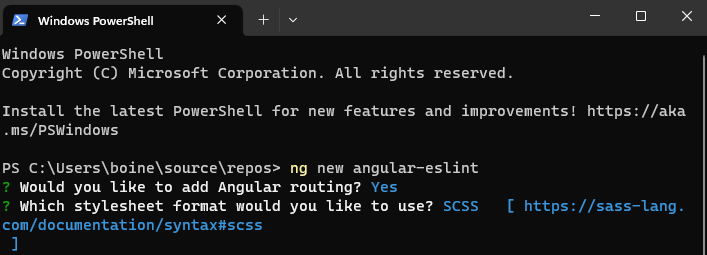
Let's create a new project with the Angular CLI by running the following command in a terminal:
ng new angular-eslintAfter running the command, Angular CLI will ask you few questions to configure your new Angular project:
Then go inside the project with the command:
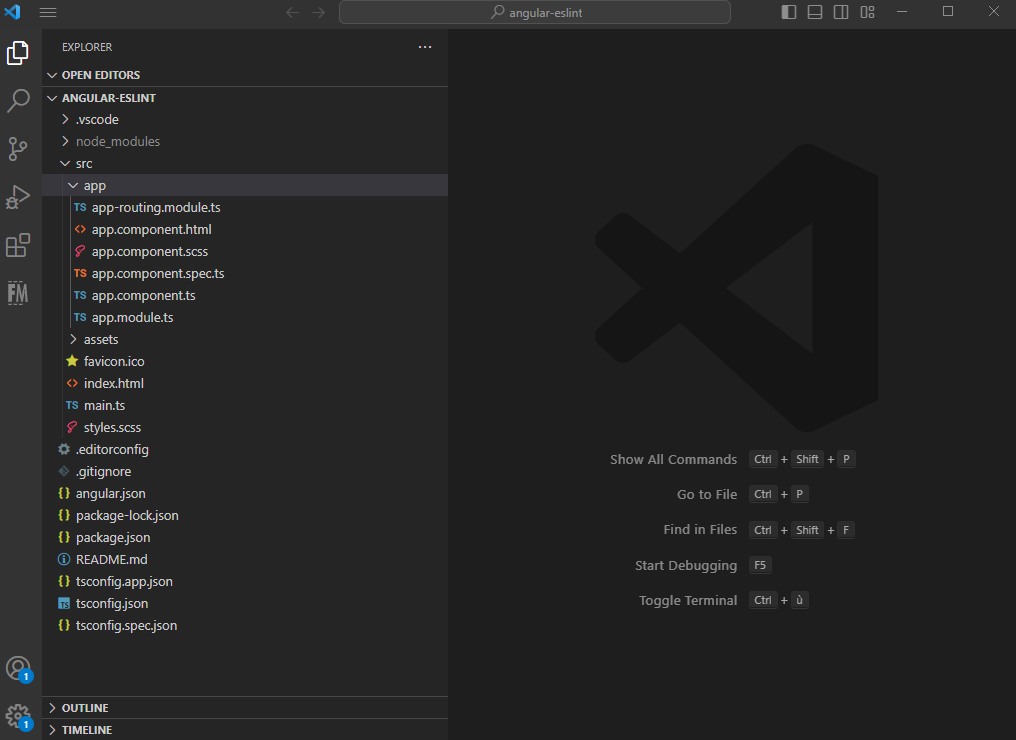
cd .\angular-eslint\And open the project with Visual Studio Code:
code .If all has gone well so far, you should have the following architecture:
Install ESLint
Now, we will install ESLint in our project.
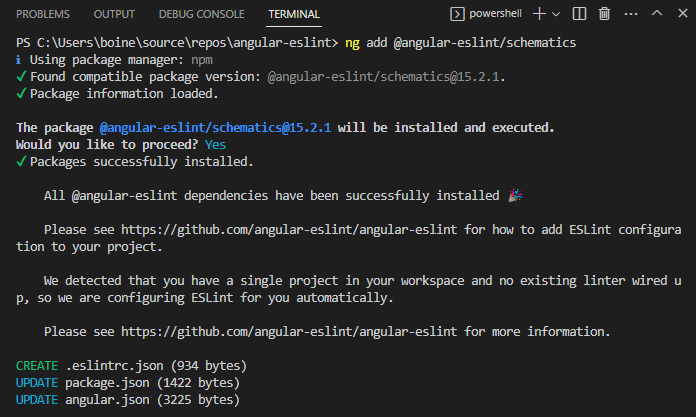
To do this, use the Angular CLI to add @angular-eslint/schematics:
ng add @angular-eslint/schematicsIn addition to installing all the dependencies, the ng add command will automatically detect our Angular project without a configured linter.
It will then go ahead and connect everything for us:
Analize files
To analize files with ESLint, we can use the following command:
ng lintAfter running the command, ESLint will give us the result of the analize:

The "All files pass linting" message above tells us that no problems were found.
Fix files
To fix files with ESLint we can use the following command:
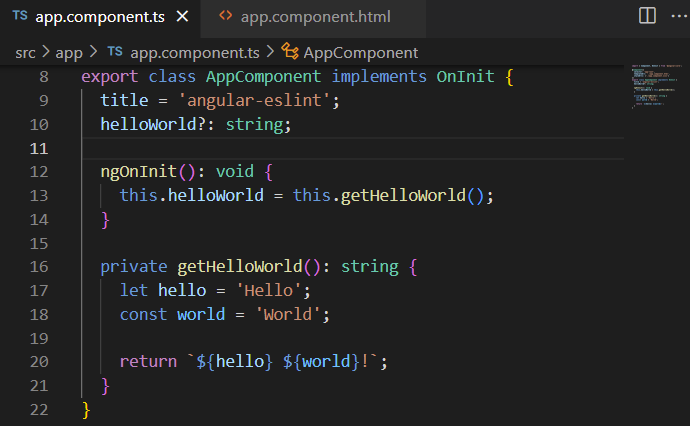
ng lint --fixLet's add a small function in the app.component.ts file that can be fixed by ESLint:
Then let's run the ng lint command to analyze the previous code:
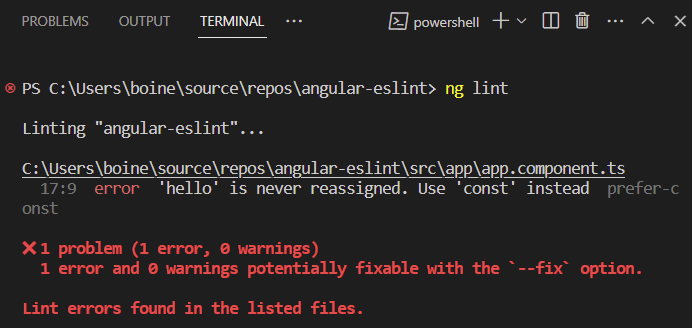
Here ESLint informs us that hello is never reassigned and that we can use const instead of let.
Now let's run the ng lint --fix command:
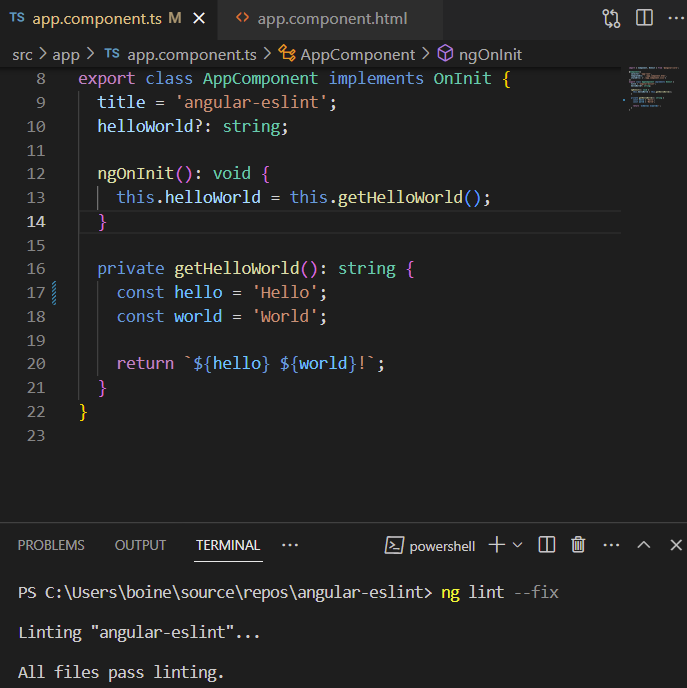
As we can see above, let has been replaced by const. 😉
VS Code Extension
One of the great things about ESLint is that it can be easily integrated with many popular editors and IDEs, including Visual Studio Code (VS Code).
To integrate ESLint with VS Code, you can install the ESLint extension by following these steps:
- Open VS Code
- Go to the Extensions view by clicking on the Extensions icon in the left-hand toolbar or by using the shortcut Ctrl+Shift+X (Windows, Linux) or Cmd+Shift+X (macOS).
- Search for "ESLint" in the search bar.
- Click on the "Install" button next to the "ESLint" extension.
After installing the ESLint extension, it will automatically detect ESLint configuration files in your project and start providing you with feedback and suggestions for improving your code.
Conclusion
In this article, we learned how to install ESLint in an Angular project. We started by creating a new Angular project and installing ESLint using the @angular-eslint/schematics package. We then ran ng lint to analyze our files and ng lint --fix to fix any issues found by ESLint.
By using ESLint, we can detect and fix potential problems in our codebase and ensure that our code follows best practices and conventions.
I hope this article has helped you to have a better understanding of ESLint and that you will use it in your projects.
Source code of the article: Github source code
Thanks for reading! 🙂
